Fire Table Installation Guide 2026: Avoid 35% More Hazards

Installing a luxury fire table transforms your outdoor space into a sophisticated retreat, but improper setup creates serious safety risks. Many homeowners underestimate the complexity of gas connections, clearance requirements, and foundation stability. This comprehensive guide walks you through every critical step, from permit verification to professional installation, ensuring your fire feature operates safely while elevating your backyard aesthetics with confidence and peace of mind.
Table of Contents
- Prerequisites And Preparation
- Site Preparation And Foundation
- Safety Considerations And Code Compliance
- Installation Process And Timeline
- Common Installation Mistakes And Troubleshooting
- Alternative Installation Methods And Tradeoffs
- Maintenance And Troubleshooting
- Expected Results And Outcomes
- Explore Luxury Fire Tables At Backyard Pyre
- Frequently Asked Questions
Key Takeaways
| Point | Details |
|---|---|
| Professional Installation Required | Qualified technicians must handle all gas and electrical connections to prevent leaks and fire hazards. |
| Foundation Stability Critical | Proper non-combustible base prevents over 20% of operational complaints and safety issues. |
| Clearance Reduces Fire Risk | Maintaining manufacturer-specified distances from combustibles cuts fire hazards by 35%. |
| Annual Maintenance Essential | Regular inspections and cleaning significantly extend fire table lifespan and preserve safety. |
| Fuel Type Impacts Setup | Choose between natural gas and propane based on site infrastructure, usage patterns, and storage capacity. |
Prerequisites and Preparation
Before breaking ground on your fire table installation, you need to lay the groundwork for a safe, code-compliant project. Skipping preparation steps invites hazards and costly mistakes down the line.
Start by contacting your local building department to verify permit requirements and applicable codes. Many jurisdictions mandate permits for permanent outdoor fire features, especially those requiring gas line installations. Understanding these regulations upfront prevents project delays and legal complications.
Next, decide between fuel options: propane vs. natural gas based on your property setup. Natural gas requires existing infrastructure or new line installation, while propane offers flexibility but needs tank storage and periodic refills. Each fuel type carries distinct installation and safety considerations that shape your entire project approach.
Gather essential tools before installation day:
- Gas leak detector for connection verification
- Adjustable wrenches and pipe fittings for gas lines
- Spirit level to ensure foundation stability
- Measuring tape for clearance verification
- Fire-resistant gloves and safety glasses
The most critical preparation step is hiring qualified professionals. All gas fire table installations must be performed by qualified service technicians to ensure compliance with safety codes and avoid hazards like leaks and fire. Amateur gas work risks explosions, carbon monoxide exposure, and voided warranties. Licensed technicians carry insurance, understand local codes, and possess specialized equipment for safe connections.
Pro Tip: Schedule your technician consultation during the planning phase, not after you’ve purchased your fire table. They can verify your site meets requirements and identify potential obstacles before you commit to a specific model or location.
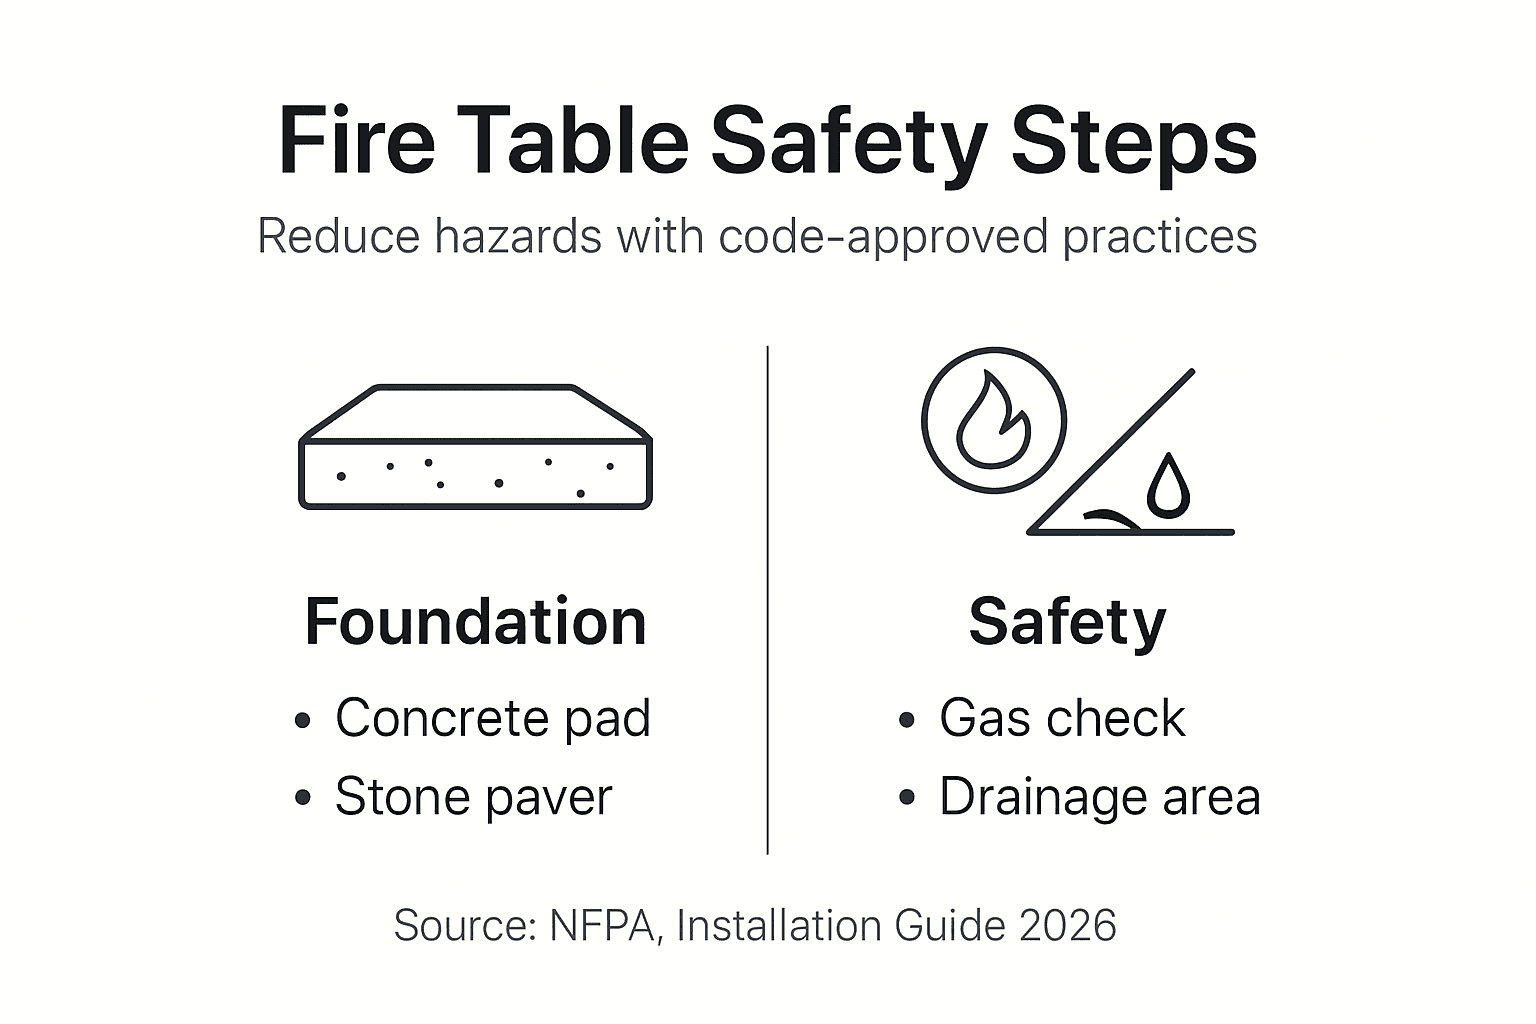
Site Preparation and Foundation
Your fire table’s foundation determines its long-term stability and safety performance. Preparation of a stable, level foundation using non-combustible materials like concrete or stone is essential to prevent fire hazards and ensure stability of the fire table.
Select a location that meets these critical criteria:
- Level ground or prepared pad to prevent tipping
- Minimum 10 feet from structures, pergolas, and overhangs
- Clear of low-hanging branches and foliage
- Protected from prevailing winds that could affect flame patterns
- Accessible for gas line routing and maintenance access
Concrete pads and stone pavers rank as the safest foundation materials. Pour a 4-inch concrete slab extending at least 6 inches beyond the fire table footprint on all sides, or lay interlocking pavers over compacted gravel base. These non-combustible surfaces withstand high temperatures while providing the stable platform your fire feature requires.
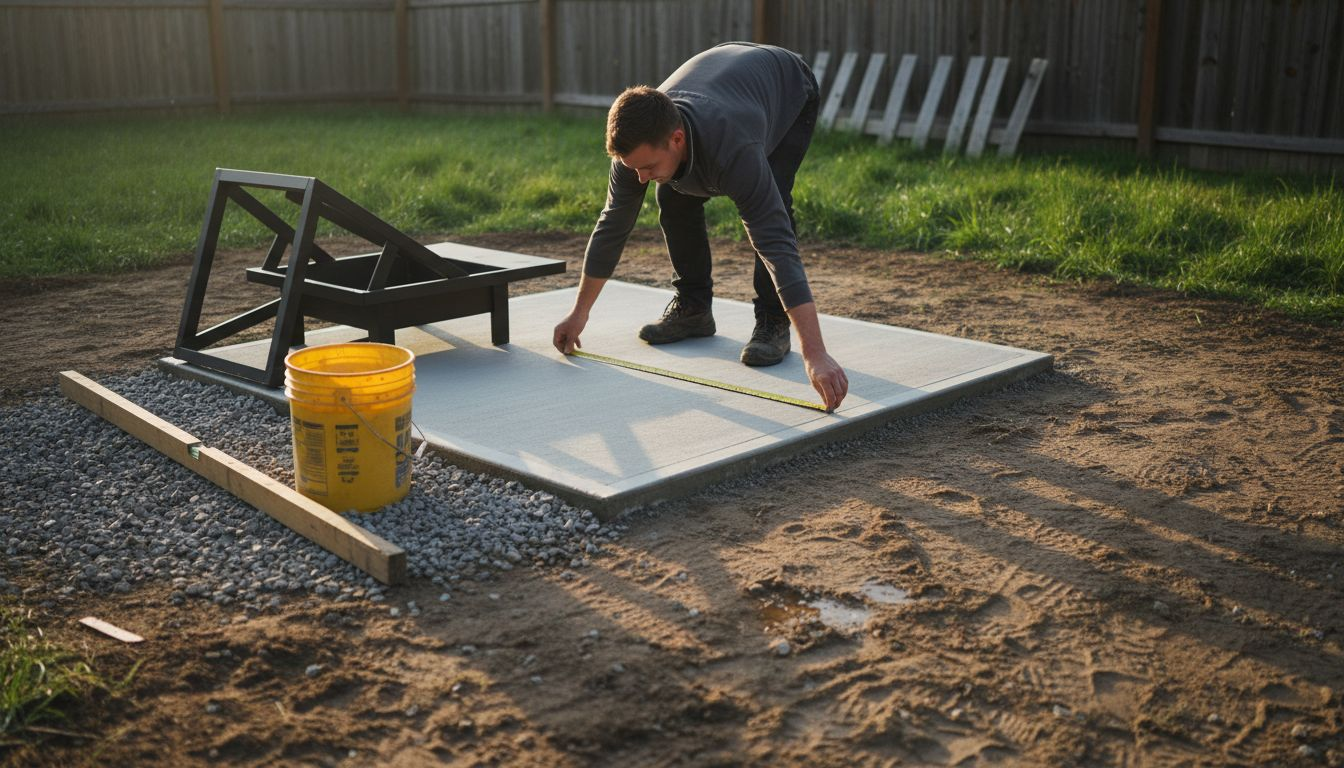
Foundation problems cause significant operational issues. Installing a fire table on an uneven surface can cause instability leading to operational faults and potential safety hazards, with over 20% of customer complaints related to improper foundation. An unlevel base stresses connections, creates pooling issues, and can tip during use.
Maintain proper clearances to combustible materials:
| Material Type | Minimum Distance | Reason |
|---|---|---|
| Wood structures | 10 feet | Prevents ignition from radiant heat |
| Vinyl siding | 12 feet | Melting and fire risk |
| Plant material | 5 feet | Eliminates fuel source |
| Overhead cover | 8 feet | Allows heat and smoke dissipation |
Ensure adequate drainage around your foundation to prevent water accumulation under the fire table. Grade the area with a slight slope away from the installation site, or install drainage channels if working with existing hardscape. Standing water undermines foundation stability and accelerates corrosion of metal components.
Ventilation matters even for outdoor installations. Position your fire table where natural air circulation prevents gas accumulation. Avoid enclosed alcoves or sunken patio areas where propane could pool, as this heavier-than-air fuel creates explosion risks in confined spaces.
Pro Tip: Use a laser level during foundation preparation to achieve perfect horizontal alignment. Even slight slopes invisible to the naked eye can cause operational problems and void manufacturer warranties. Visit our outdoor living space site prep guide for detailed foundation planning.
Safety Considerations and Code Compliance
Safety protocols and code compliance form the backbone of responsible fire table installation. Cutting corners on these requirements dramatically increases hazard risks and potential liability.
All gas fire table installations must be performed by qualified service technicians to ensure compliance with safety codes and avoid hazards like leaks and fire. This isn’t optional advice but a fundamental requirement backed by building codes nationwide. Licensed professionals understand gas pressure requirements, proper fitting torque, and leak detection protocols that protect your property and family.
Electrical safety deserves equal attention for fire tables with integrated lighting or electronic ignition systems. Proper electrical grounding and bonding of gas piping systems reduce the risk of fire caused by electrical discharges, particularly during lightning strikes. Your technician should install ground fault circuit interrupter (GFCI) protection on all outdoor electrical connections and bond metal gas piping to your home’s grounding system per National Electric Code requirements.
Clearance requirements dramatically impact fire safety. Maintaining minimum distances from combustible materials reduces fire risks by 35% according to industry safety data. These aren’t suggestions but tested standards that prevent ignition of nearby materials from radiant heat and flame contact.
Key safety protocols include:
- Annual professional inspections of gas connections and components
- Pre-use leak checks with approved detection solution
- Immediate shutdown and professional service for any gas odors
- Never leave operating fire table unattended
- Keep approved fire extinguisher within 10 feet
- Post emergency contact numbers in visible location
“Homeowners who follow manufacturer clearance specifications and schedule annual professional maintenance experience 35% fewer safety incidents compared to those who skip these critical steps.”
Code compliance varies by jurisdiction but typically follows National Fire Protection Association (NFPA) standards and International Fuel Gas Code (IFGC) requirements. Your local authority having jurisdiction (AHJ) may impose additional restrictions based on regional fire risk, building density, or environmental conditions. Never assume your installation meets code without verification. Review code compliance for fuel types specific to your chosen fuel source.
Insurance considerations also come into play. Many homeowners policies require notification of permanent outdoor fire features. Some insurers offer premium reductions for professionally installed systems with documented annual maintenance, while others may increase rates or exclude coverage for DIY installations. Contact your insurance agent before installation to understand policy implications.
Installation Process and Timeline
A methodical installation process ensures your luxury fire table operates safely from day one. Professional installation typically spans 4 to 8 hours depending on site complexity and fuel type.
Follow these sequential steps for successful installation:
- Obtain required permits and schedule required inspections with your local building department
- Prepare the foundation according to manufacturer specifications and allow concrete to cure fully (typically 7 days)
- Route gas lines from supply source to fire table location using approved materials and methods
- Install manual shutoff valve within 6 feet of fire table for emergency fuel isolation
- Position fire table on prepared foundation and verify level placement using precision tools
- Connect gas supply line to fire table inlet using proper fittings and sealants
- Perform pressure test on all gas connections to verify leak-free installation
- Connect electrical components if applicable, ensuring GFCI protection and proper grounding
- Install fire media (glass, stones, or logs) per manufacturer loading instructions
- Conduct initial ignition test and verify proper flame pattern and burner operation
- Schedule final inspection with building department to obtain certificate of occupancy
Your certified technician handles the technical connections while you focus on site preparation and aesthetic details. Natural gas installations require trenching for buried lines, adding time and cost compared to propane setups using flexible connectors to portable tanks.
Timing considerations include:
- Foundation curing: 7 to 14 days for concrete
- Gas line installation: 2 to 4 hours for simple runs, full day for complex routing
- Fire table assembly and connection: 1 to 2 hours
- Testing and verification: 1 hour
- Final inspection scheduling: 3 to 7 days from completion
Weather impacts installation timeline. Schedule your project during dry conditions when crews can work efficiently and concrete cures properly. Rain delays concrete work and makes trenching difficult. Cold temperatures slow curing and make outdoor work uncomfortable.
Explore our fire table installation steps overview for visual guides and detailed preparation checklists. Browse fire table product examples to understand specific installation requirements for different models.
Common Installation Mistakes and Troubleshooting
Even experienced homeowners make predictable errors during fire table installation. Understanding these pitfalls helps you avoid costly corrections and safety hazards.
Common errors like improper gas connections, inadequate ventilation, and ignoring clearance requirements cause most installation failures and safety hazards. These mistakes share one root cause: rushing the process without professional guidance.
Frequent installation mistakes include:
- Using incorrect pipe thread sealant that degrades with gas exposure
- Overtightening fittings causing stress cracks and future leaks
- Positioning fire table too close to combustible materials
- Installing on unstable or combustible foundation materials
- Failing to account for thermal expansion in gas lines
- Skipping pressure testing before initial use
- Neglecting to install required manual shutoff valve
- Improper gas regulator sizing causing poor flame performance
Troubleshooting common operational issues:
Weak or uneven flames typically indicate gas pressure problems or clogged burner ports. Verify your regulator matches manufacturer specifications and clean burner orifices with compressed air. Never use wire or sharp objects that could enlarge ports and create dangerous over-firing.
Gas odors signal leaks requiring immediate shutdown. Close the manual shutoff valve, evacuate the area, and contact your gas company emergency line. Never attempt to locate leaks using open flame. Professional leak detection using approved solutions identifies problem connections safely.
Ignition failure often stems from electrode positioning or spark gap issues. Check that ignition electrodes sit at proper distance from burner ports (typically 1/8 inch) and verify electrical connections remain tight and corrosion-free.
Pro Tip: Keep detailed installation photos showing connection points and component placement. These images prove invaluable during troubleshooting and warranty claims. Document your installation from multiple angles before covering gas lines or completing final assembly.
Regular professional inspections catch developing problems before they become safety hazards. Schedule annual service calls during the off-season when technicians have better availability and can thoroughly examine all components.
Alternative Installation Methods and Tradeoffs
Choosing between fuel types and installation approaches involves balancing convenience, cost, and site-specific constraints. Each option carries distinct advantages and limitations.
Natural gas installations provide unlimited fuel supply through permanent utility connections. You’ll never run out mid-gathering or face refill trips. Fixed monthly utility costs simplify budgeting compared to propane’s fluctuating tank prices. However, natural gas requires existing infrastructure or expensive new line installation potentially costing $500 to $2,000 depending on distance from your meter.
Alternative installation options include using propane tanks for fuel instead of natural gas lines, suitable for locations lacking gas infrastructure but requiring attention to storage regulations and refills. Propane offers installation flexibility with no utility line requirements and higher BTU output per cubic foot, delivering more heat for comparable burner sizes.
Propane tradeoffs include:
- Tank storage requires weatherproof enclosure or decorative concealment
- Refills needed every 20 to 40 hours of operation depending on tank size
- Heavier-than-air properties demand excellent ventilation to prevent pooling
- Cold weather reduces tank pressure affecting flame performance
- Higher fuel costs per BTU in most regions
| Factor | Natural Gas | Propane |
|---|---|---|
| Installation Cost | $1,500 to $3,000 | $800 to $1,500 |
| Fuel Availability | Requires utility service | Universal availability |
| Refill Frequency | Never | Every 20 to 40 hours use |
| BTU Output | Lower per cubic foot | Higher energy density |
| Operating Cost | $1 to $2 per hour | $2 to $4 per hour |
| Portability | Permanent installation | Tank exchangeable |
Your location often dictates fuel choice. Properties without natural gas service make propane the practical option despite higher operating costs. Urban areas with existing gas infrastructure favor natural gas for convenience and economy.
DIY versus professional installation presents another decision point. While some homeowners possess skills for basic assembly, gas and electrical connections legally require licensed professionals in most jurisdictions. Attempting amateur gas work risks:
- Explosions from improper connections
- Carbon monoxide exposure
- Voided product warranties
- Insurance claim denials
- Code violation penalties
- Failed inspections requiring complete reinstallation
The modest savings from DIY installation pale against these risks. Professional installation costs $500 to $1,000 but includes liability coverage, code compliance, and warranty protection worth far more than the expense. Compare fuel options thoroughly before committing to your installation approach.
Maintenance and Troubleshooting
Proper maintenance preserves your fire table’s safety and performance for decades. Annual inspection and cleaning of the fire table components significantly reduce the risk of malfunction and prolong the lifespan of the fire table.
Schedule professional maintenance every 12 months regardless of usage frequency. Certified technicians inspect gas connections, test safety shutoff valves, verify proper burner operation, and identify developing problems before they escalate. This preventive approach costs $150 to $300 annually but prevents expensive emergency repairs and safety incidents.
Pre-use safety checks before each operation:
- Visual inspection of gas connections for corrosion or damage
- Leak test using approved detection solution on all fittings
- Verification that manual shutoff valve operates smoothly
- Clearance check ensuring no new combustible materials encroach
- Fire media inspection for proper placement and coverage
- Weather cover removal and storage in dry location
Cleaning requirements vary by fuel type and usage intensity. Natural gas burns cleaner than propane, producing less soot and residue. However, both systems accumulate debris in burner ports, especially in dusty or pollen-heavy environments. Clean burners annually using compressed air and soft brushes, never metal tools that damage ports.
Address operational anomalies immediately rather than continuing use. Strange odors, unusual flame colors, or inconsistent ignition signal problems requiring professional diagnosis. Operating compromised equipment multiplies damage and creates safety hazards. Your fire table includes safety features like flame sensors and tip-over shutoffs that need periodic testing to verify proper function.
Weather protection extends component life dramatically. Cover your fire table when not in use, protecting controls, ignition systems, and burner assemblies from rain, snow, and UV exposure. High-quality covers cost $50 to $150 but prevent rust and degradation worth thousands in premature replacement.
Winterization procedures for cold climates include draining residual moisture from gas lines, disconnecting propane tanks for indoor storage, and covering all components with breathable, waterproof materials. Never seal fire tables in plastic that traps moisture and accelerates corrosion.
Keep detailed maintenance logs documenting service dates, repairs, and component replacements. These records help troubleshoot recurring issues and provide valuable documentation for warranty claims or insurance purposes. Consult fire table maintenance tips for comprehensive care instructions.
Expected Results and Outcomes
Following this comprehensive installation guide delivers specific, measurable benefits that transform your outdoor living experience. Understanding realistic expectations helps you evaluate installation success.
Properly installed fire tables operate flawlessly with consistent flame patterns and reliable ignition. You’ll experience smooth starts every time without flooding, sputtering, or ignition delays. The burner produces even heat distribution across the fire media, creating the ambient warmth and visual appeal that defines luxury outdoor living.
Safety outcomes include:
- Zero gas leaks detected during routine testing
- Full compliance with local building and fire codes
- Passed final inspections with no required corrections
- Valid permits and documentation for insurance and resale
- Confident operation without safety concerns or warnings
Your outdoor space gains immediate aesthetic value. The dancing flames become a focal point for gatherings, extending usable outdoor time into cool evenings and shoulder seasons. Guests naturally gravitate to the fire table, creating the social atmosphere that justifies your investment in premium outdoor features.
Maintenance requirements remain minimal with professional installation. Annual service calls catch minor issues before they escalate, and properly installed systems resist corrosion and weather damage far better than rushed DIY projects. You’ll spend time enjoying your fire table rather than troubleshooting problems or arranging repairs.
Long-term durability depends on installation quality. Professional setups using code-compliant materials and methods routinely deliver 15 to 20 years of reliable service with proper maintenance. Amateur installations often fail within 5 years, requiring partial or complete reinstallation at double the original investment.
Property value benefits extend beyond personal enjoyment. Well-executed outdoor living spaces return 60% to 80% of investment at resale, with professionally installed fire features commanding premium appeal among buyers seeking move-in ready outdoor entertainment areas.
Explore Luxury Fire Tables at Backyard Pyre
Now that you understand professional installation requirements, explore the stunning fire table collections that bring this knowledge to life. Our curated selection features premium designs engineered for safe, reliable performance when installed correctly.
The Meteor Fire Table exemplifies luxury outdoor living with its contemporary design and robust construction. Each piece in our Elementi Plus collection combines Italian craftsmanship with weather-resistant materials built for decades of enjoyment. Browse our complete Luxury Fire Tables selection to discover the perfect centerpiece for your professionally prepared outdoor space. Our team provides expert guidance matching your installation plans with fire tables designed for lasting beauty and performance.
Frequently Asked Questions
Is professional installation mandatory for fire tables?
Yes, licensed technicians must handle all gas and electrical connections to meet building codes and safety standards. Amateur installation voids warranties, creates serious hazards, and fails inspections. Most jurisdictions legally require professional installation for permanent outdoor fire features.
How long does typical fire table installation take?
Professional installation spans 4 to 8 hours depending on fuel type and site complexity. Natural gas projects requiring new line trenching take longer than propane installations. Foundation preparation adds 7 to 14 days for concrete curing before fire table placement.
What maintenance does my fire table require after installation?
Schedule annual professional inspections to examine gas connections, test safety systems, and clean burner components. Perform pre-use leak checks before each operation and cover your fire table when not in use. These simple steps dramatically extend equipment life and preserve safe operation.
Can I use propane if natural gas isn’t available?
Absolutely. Propane works excellently where natural gas infrastructure doesn’t exist. You’ll need proper tank storage meeting local codes and periodic refills every 20 to 40 operating hours. Propane delivers higher BTU output than natural gas but costs more per hour of operation.
How do I ensure my installation site meets safety requirements?
Hire qualified technicians during the planning phase to evaluate your proposed location. They verify adequate clearances from combustibles, assess foundation stability, confirm proper ventilation, and identify code compliance issues before you purchase equipment. This prevents costly surprises during installation.